
Hey guys! We love raising chicks. Spring is starting to show itself around here and if you’ve been to Tractor Supply or almost any other feed store then I know you have probably heard the chirps of those new chicks!
For years, Robbyn and I dreamed about being able to raise chickens. Having our own hens (and fresh eggs) was one of our biggest wants when living in an apartment in town. They were the first animals that we brought to the homestead.
Why Did We Decide to Raise Chicks?
We started off with 4 silkie hens that we got from a friend. A few months later we picked up 5 more ISA Browns so we could have brown eggs. Then my Granddad gifted us 2 Rhode Island Red hens a few weeks later. Chicken math is a real thing and sometimes it happens fast!
As our current flock has dwindled down over the past years (we had a coyote attack and a hawk attack!) and them having aged, our egg count has started to go down. So, we felt like it was time to get some more ladies to add to the group. This time we wanted to start with raising our own chicks. So we went ahead and bit the bullet and got some new chicks to refresh and liven up our flock!
Chick Breeds
We picked up 14 chicks in a variety of different breeds so we can get some beautiful colored eggs. We ordered 10 chicks online through Tractor Supply. An assorted egg layer pack that are a random grab of Americana, Olive Egger, Prairie Bluebell Egger, Sapphire Olive Egger, Starlight Green Egger, Midnight Majesty Marans, French Black Copper Marans, or Cuckoo Marans. We couldn’t resist the temptation, so we also picked up 4 more chicks in store; 2 Golden Comets and 2 Leghorns. We chose those breed varieties mainly for their assorted egg colors, including blue, green, copper, brown, and white eggs. If the egg color doesn’t matter as much to you then almost any breed will work just fine!
Please don’t be intimidated or scared of raising chicks! They really are not very hard to raise, they just take some preparation and care. Go pick up some chicks and follow along with steps below and you will be well on your way to having your own egg laying flock!
What Supplies/Tools Are Needed to Raise Chicks
- A brooder (these can be as simple or as complicated as you want)
- Wood chips
- Waterer
- Feeder
- Heat lamp or Heat plate (or both)
- Chick starter feed
- Chick grit
Simple DIY Brooder Box
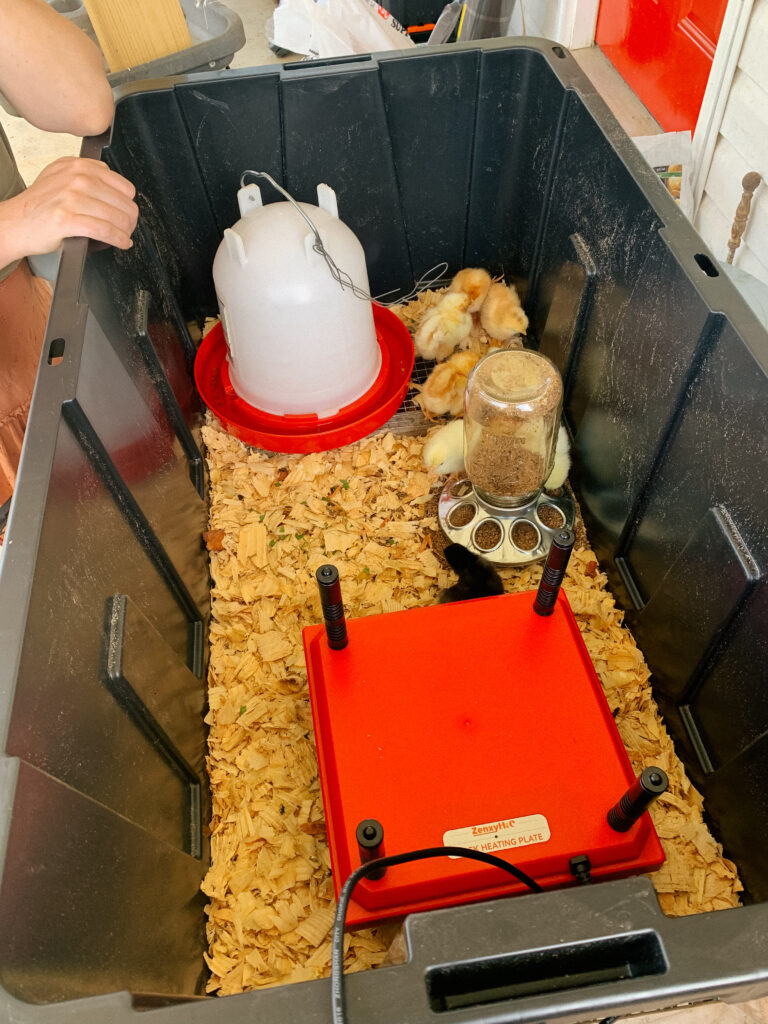
This year, I am using a really simple Brooder box that I put together. I have a second Brooder that is built better, but it is a little more suited for raising a smaller batch of chickens (5-10) inside your house. This year we wanted to raise a few more than that, and with 2 cats and 2 kids under 2, we wanted to move the system outside.

Items Needed for Brooder Box
All you’ll need for this is a plastic storage container (we used a 40L container from Sams Club, but you could use a smaller size if you want to), a 2×4 and a 1×4 (or various wood scraps), 24” wide ½” hardware cloth, and a handful of poultry staples.
Instructions to Build Brooder Box for Chicks
The container box will be left as-is and set-up with broader supplies and we will build a really simple top to keep the chicks safe! To do that, I measured the top of the box (~24”x38”) and built a frame to fit that using 24” 2×4 sections and 38” 1×4 sections. Before I attached the frame pieces, I attached the 24” wide hardware cloth to the 1x4s using a few poultry staples and then I screwed the frame pieces together to make a snug fit.
I also normally add a small, framed catch system to set the waterer on – for this I just make an 8”-12” square frame with 2x4s and then staple ½” hardware cloth to the top. You could also use cardboard or something like that and it would serve the same purpose. This just helps to keep the area around the feeder and waterer a little bit cleaner.
That’s it, the brooder box is done!
Note: You do not have to use 2x4s and 1x4s, I just had those pieces handy – any wood will work just fine.
Let’s Get Going!
I’ll finish this up by giving you a timeline of how to get started with your chicks and what to expect.
Before Chicks Arrive
Go ahead and get your Brooder set up.
- First, layer the bottom of your Brooder box with a few inches of wood shavings. I do about 3-6 inches of pine shavings from Tractor Supply.
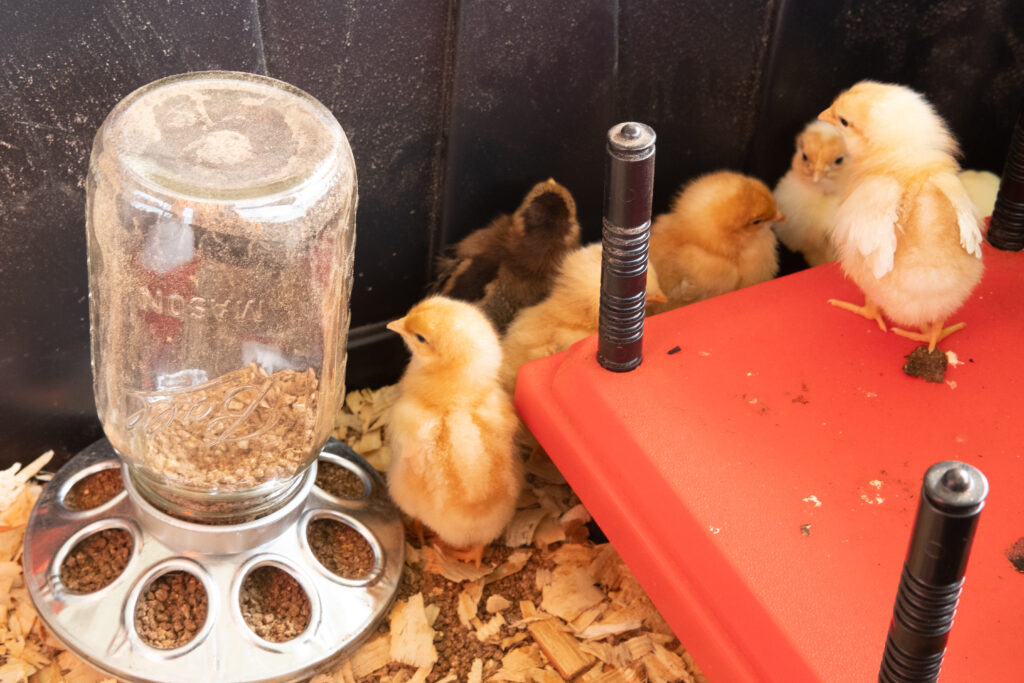
- Set up the chick’s water station. I use either a quart jar waterer or a larger 5 quart waterer that you can find at any farm store.
- Set up the chick’s feed station. Farm stores have feeders available that will match the waterers that I use, or you could use a flip top style feeder.
- Set up a grit station for the chicks. For this, I normally get chick grit from the store and then “serve” it to the chicks in a mason jar lid.
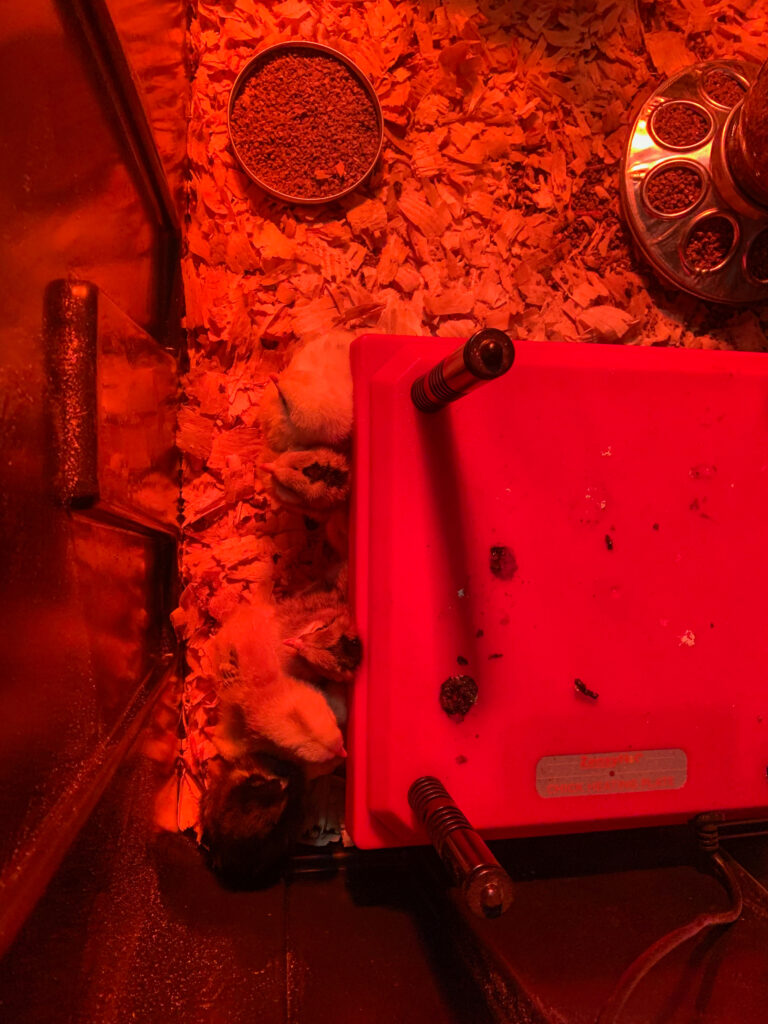
- Finally, set up your warmers. The 2 most common warming systems are heat plates and heat lamps. Either one will work just fine. We use a combination of both styles. We have a heat plate in the brooder for the chicks to huddle under and we also have a 150W red heat lamp that is heating the area around the feed and water station.
Day One
The chicks have been acquired. Great, let’s go! When you get them home I like to make some “Magic Water” for the chicks. This is a recipe that I found from Justin Rhodes in his book, The Rooted Life. It is a really simple combination of 1 gallon of warm water, ½ cup of honey, ¼ cup of Apple Cider Vinegar, and 4 minced garlic cloves. I normally scale that way down. Once made, take the chicks out of their box one at a time, and dip their beak into the magic water. This helps to boost their immune system and then set them into the brooder.
If you haven’t already, fill up the feeder, waterer, and grit feeder. Make sure that they are situated in the brooder in an area that allows most of the chicks to eat or drink at the same time.
Something else that I like to do is to tear up some fresh grass and scatter it in the brooder. In my mind, having some fresh grass available helps the chicks out and gets them used to foraging.
Weeks 1-3
Throughout the first few weeks, I like to keep a check on the chicks pretty regularly. That allows us to make sure they have clean food and water. It also gives us a good excuse to take them out and love on them a little! Fill and clean the feeder and waterer when they start to look dirty and check periodically to make sure the heaters are working correctly.
I like to keep adding fresh grass everyday unless it is storming.
Towards the end of week 3, you can start getting the chicks used to not having supplemental heat by turning off the heat during the day and then some at night.
Weeks 4-6
Between 4 and 6 weeks, most chickens will be feathered out. This means that they are good to leave the Brooder and move into their coop. I would recommend waiting for a few days of good weather before you move them. You really want to make sure that night time temperatures aren’t approaching freezing and you want day time temps to be 50F or warmer. I also prefer to make the move when it’s not going to be very windy or rainy over the next 2-3 days. This gives the chicks a comfortable environment to settle into.
When you are ready to make the move into the coop, do it after dark. Having the chicks start off spending the night at their new home gets them more comfortable and teaches them where to go back to at night.
Once the chicks are moved into their new home, make sure they have a feeder, waterer, and grit feeder setup and ready to go. You can also free feed kelp, aragonite, oyster shells, or repurposed egg shells if you would like to do that. These just provide extra minerals and you do not have to do them all.
Another addition you might want to add to the coop or run is a dust bath. I normally don’t do this since I have several open dirt spots around my house that the chickens already use as a duster.
Weeks 6-8
At 6-8 weeks, chicks can transition off of chick starter feed and move to a grower food. This isn’t a necessary change but it will save a little bit of money on feed! When you make that switch, you can feed your chickens like normal (~¼-⅓ lb of feed per chicken each day). Keep that up with grower feed until you get your first eggs, which will be anywhere from about 16-24 weeks on average.
Week 16-24
Sometime around here you will get your first eggs. What a day that will be! Chickens can do a lot of work for you up until this time, but there is nothing quite like getting some fresh eggs from your chickens!
Once you start getting eggs, you can change over to layer feed. Layer feed is specially formulated for laying hens. It includes more calcium and minerals to help produce better and stronger eggs.

Tips and Tricks
As you can see, raising chickens really isn’t very hard. It just takes a little bit of time and effort to care for your new feathered friends. There are some tips and tricks that can help keep your girls happy and healthy.
- A plastic owl or hawk can help provide protection against aerial predators. We keep ours on a post and move it around with our chickens.
- Feed your chickens food scraps. It helps get rid of scraps and it can help cut down on food costs.
- If you keep chickens in a stationary coop and run. Things can get smelly. Lay down a few inches of pine shavings will freshen everything.
- While your chickens are learning to lay in their nest boxes, close them off at night so they don’t sleep (and poop) in them.
- Adding a few tablespoons of Apple Cider Vinegar into the watering station every month can help boost the immune system. This keeps everybody healthy.
- When buying feed, make sure to check if it is medicated or not. Neither way is necessarily better than the other, but it is good to know which one you are feeding. For the record, we do not feed medicated feed here.
- Try out a nipple watering system for your chickens. They are easy for the chickens to use and easier to keep clean.
- Fermenting food is a good way to cut down on food usage. It does take a little bit extra time and equipment to do correctly.
If you try this DIY please tag us on Instagram! @the_hollyhomestead
Love all the helpful tips! Can’t wait to see the egg colors