
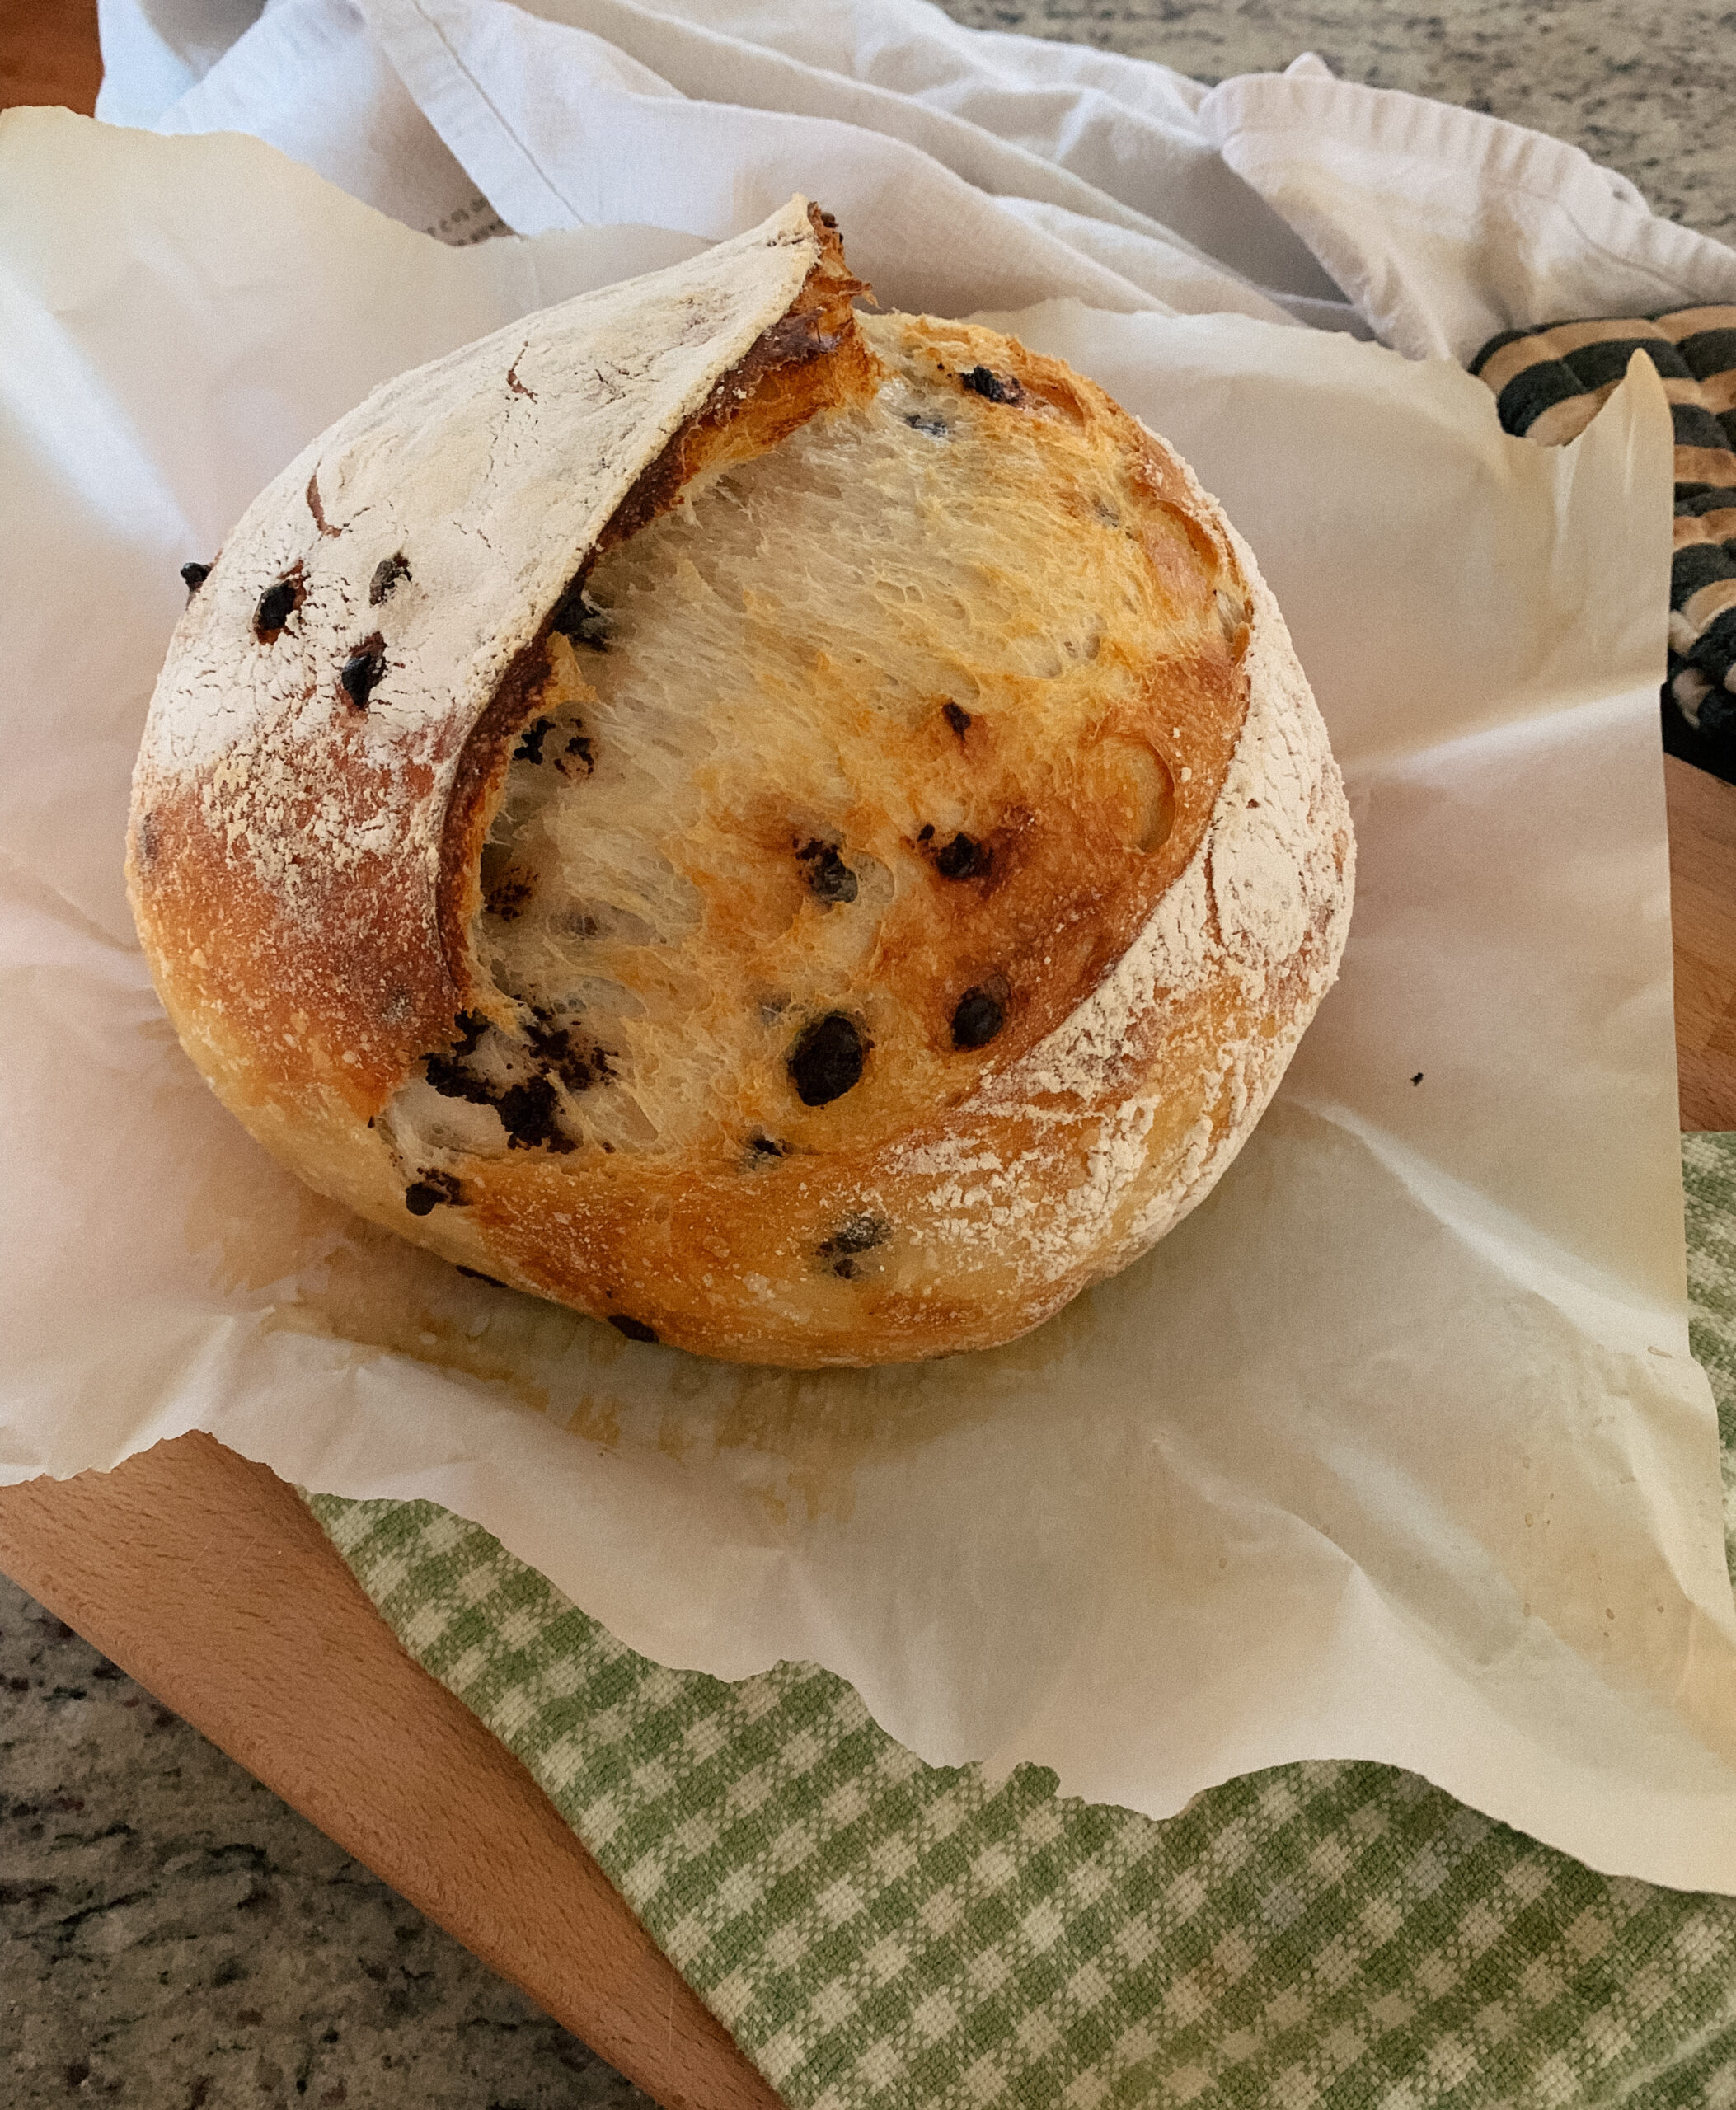
Chocolate Chip Sourdough Bread is the perfect weekend breakfast. It’s full of the soft spongey texture we all know from traditional sourdough, but chocked full of gooey chocolate chips. It’s beautiful and decorative exterior would make a wonderful show stopper for anyone’s brunch or desert table.
Here in Alabama, false spring has made it’s grand arrival and we are dreaming about all things spring. We have been making garden plans, ordering seeds, and eagerly awaiting the arrival of our new chicks!
This is the first spring that we are getting serious about growing our homestead through a big veggie garden and expanding our flock. We want this to be our most productive harvest season to date.
Since Zach and I have been busy planning and working on all of our exterior projects, I wanted to take a few moments to intentionally think about how we were going to nourish ourselves for the remainder of the week.
This Chocolate Chip Sourdough Bread immediately came to my mind. It’s sweet and simple to make, so it makes a perfect addition to our everyday breakfast or snack plate.

A Few Tips for Making Chocolate Chip Sourdough Bread
- Having a bubbly sourdough starter or one slightly past it’s peak will make for a better rise
- Use a scale to accurately measure your ingredients
- You can use all-purpose or bread flour for this recipe – whichever one you have handy will work
- If you are new to the sourdough process, I highly recommend checking out how to make a sourdough starter here and how to maintain a starter here
Tools You May Need
- Large Glass or Ceramic Bowl
- Wooden Spoon or Danish Dough Wisk
- Benetton Basket or Bowl for Rising
- Kitchen Scale
- Dutch Oven with Oven Safe Lid
- Parchment Paper
- Lame or Very Sharp Knife
Sourdough Lingo That May Be Helpful
- Autolyse: 20 – 30 minutes after initial combination of flour, starter, and water. This time allows for the flour to absorb the liquid and fully hydrate, and makes the dough a bit more easy to handle as the gluten forms.
- Bulk Ferment: Referring to the first initial rise. This is the time that the dough ferments in a single mass.
- Stretch and Fold: The process of forming gluten in no knead bread. The purpose of a stretch and fold is to allow for the build up of gluten within the dough, these will transform your dough from a shaggy mixture to a soft smooth dough ball.
- Proofing: Allowing the dough to rest, ferment, and rise.
- Scoring: Cutting the top of the dough to allow for the bread to expand without bursting in unwanted areas.
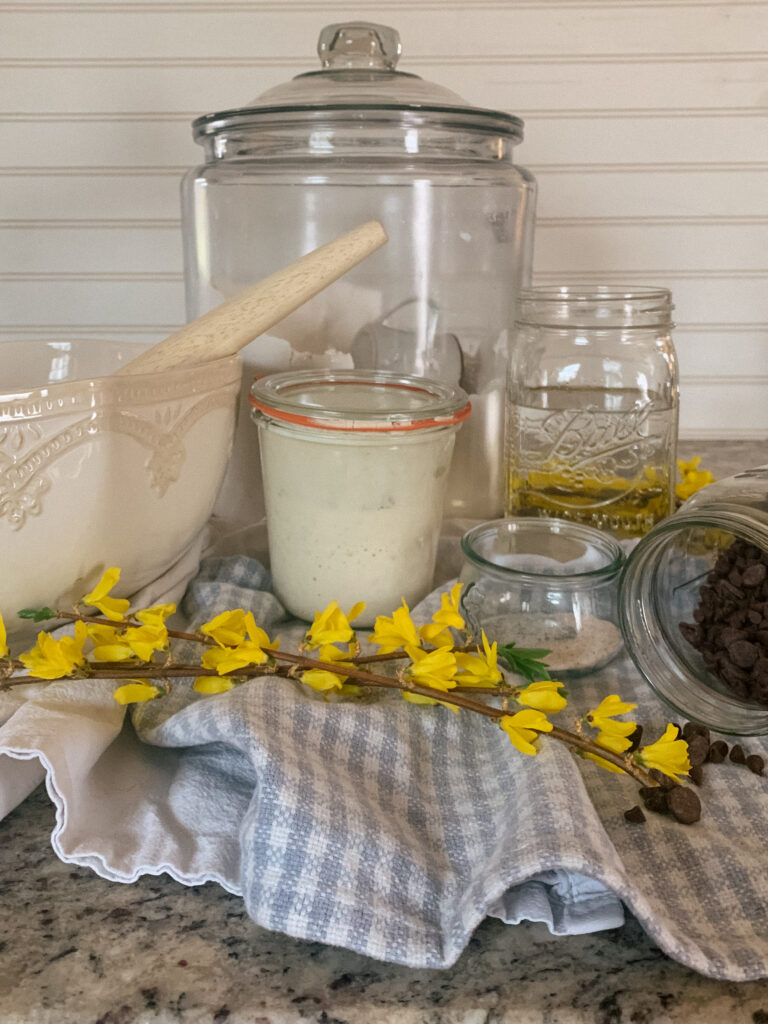
Ingredients
Bread Flour or All Purpose Flour
Sourdough Starter
Water
Salt
Semi Sweet Chocolate Chips
How to Prep Chocolate Chip Sourdough Bread Dough
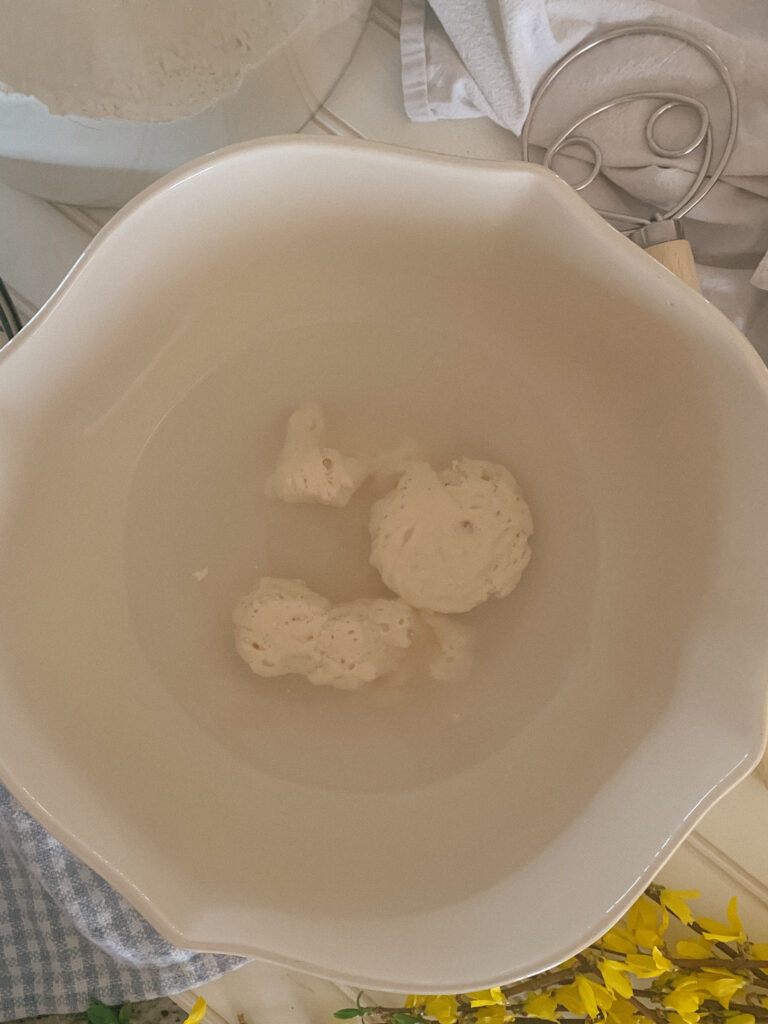
Feed your sourdough starter 6-12 hours before you are ready to begin mixing your dough. This is to ensure that your starter is nice and bubbly; and active.
In a large mixing bowl add your active sourdough starter and mix until combined.
Add the flour to the bowl. Mix until a shaggy dough is formed and allow to rest for up to 30 minutes. This is called the autolyse.
After you have allowed the dough to rest, add your salt to the dough mixture. Wet your hands with cool water and begin incorporating the salt with your first set of stretch and folds.
Stretch and folds are simply loosening the dough from the sides of the bowl, stretching the dough up and then folding it over the remaining dough.
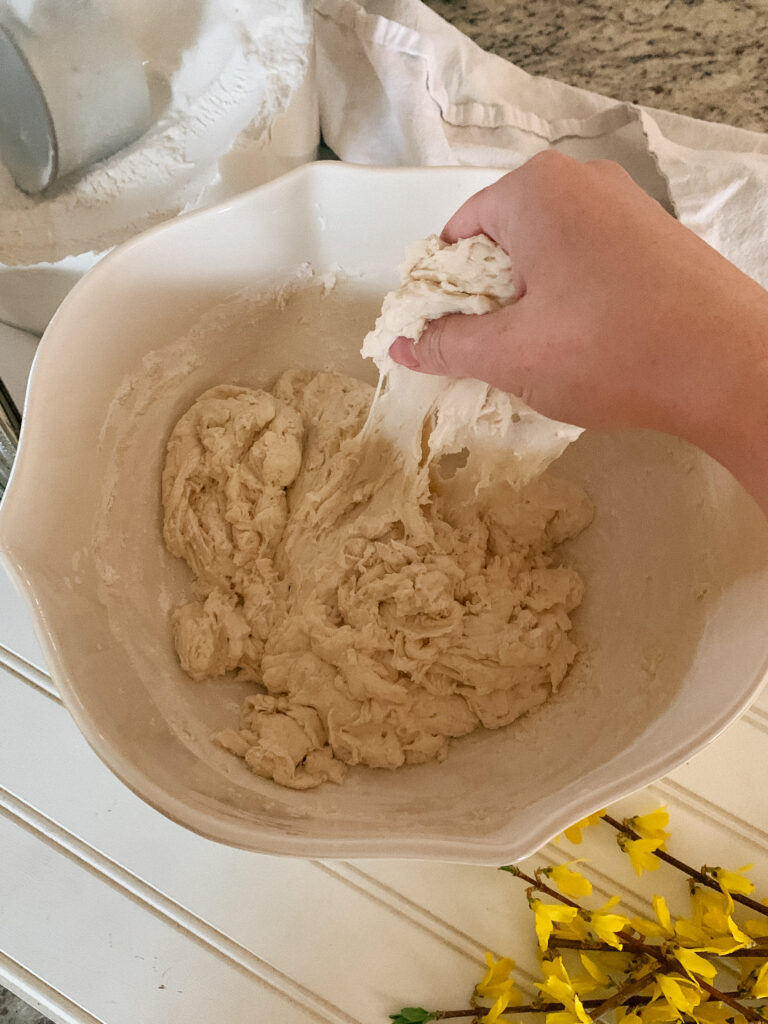
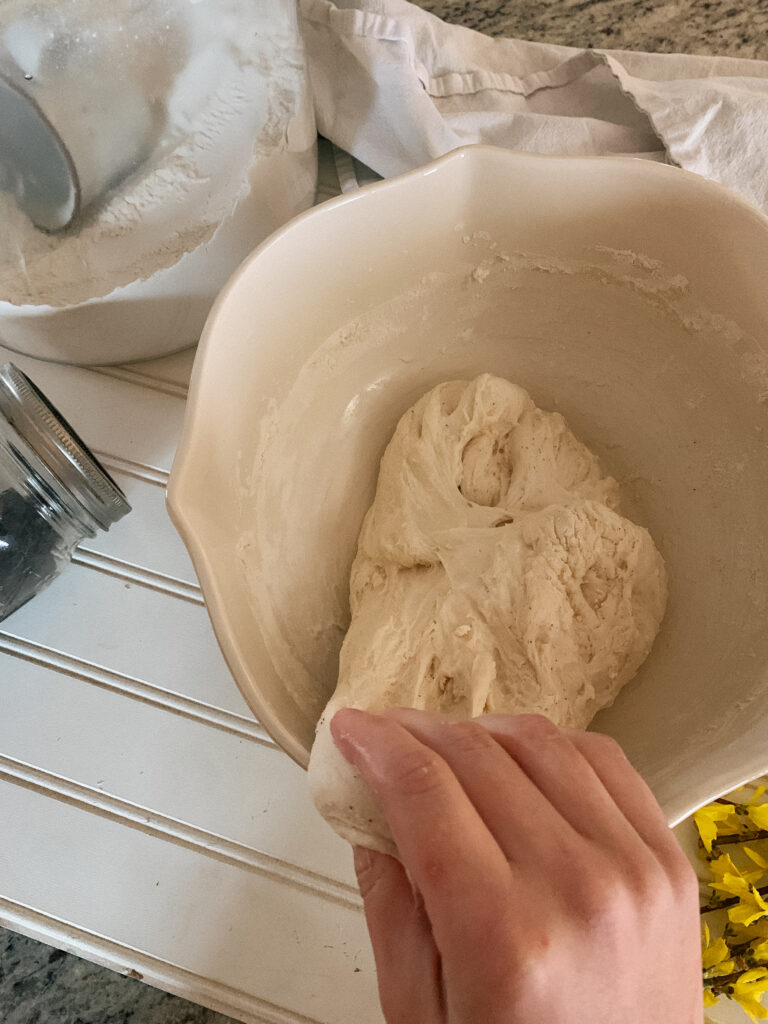
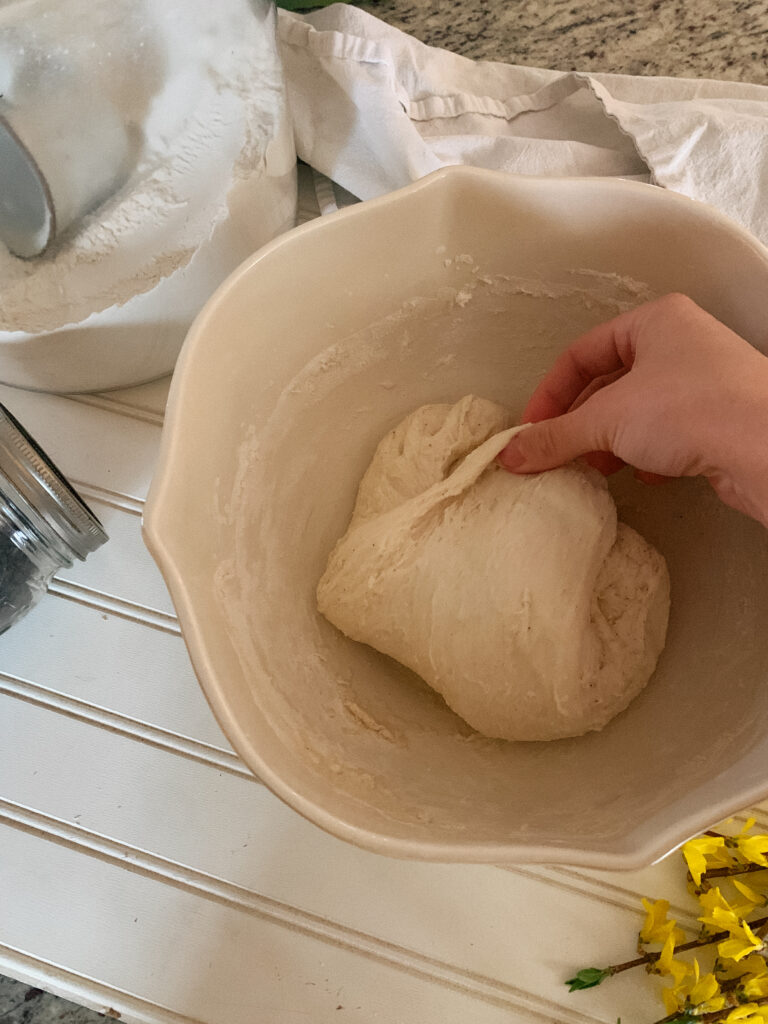
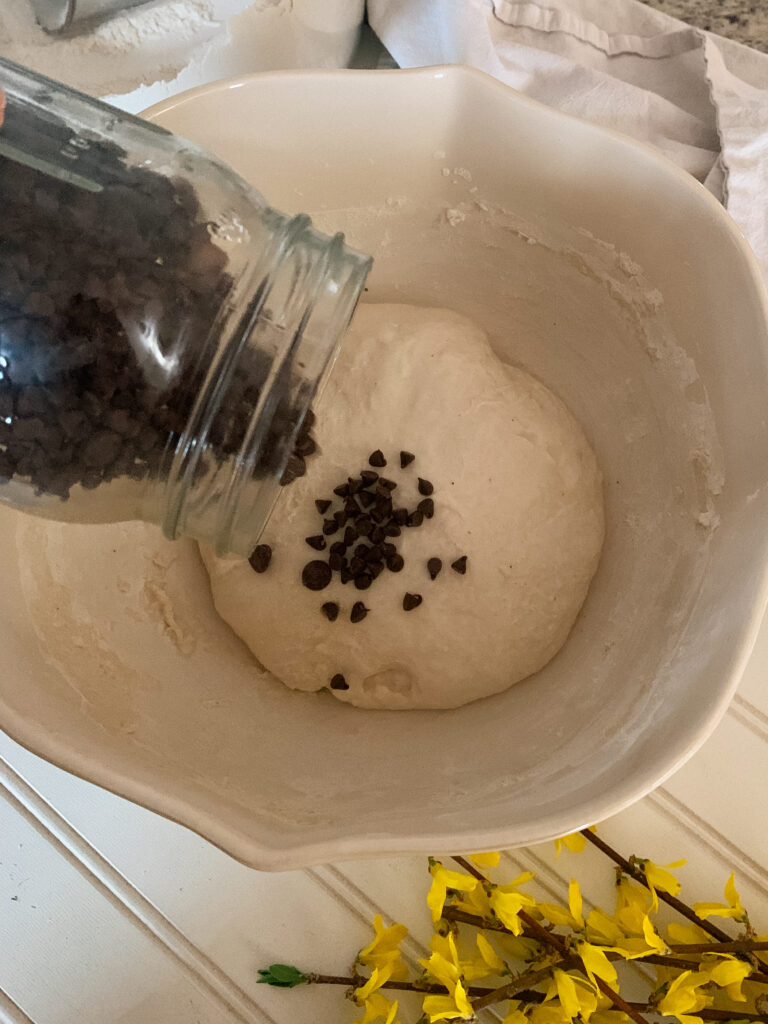
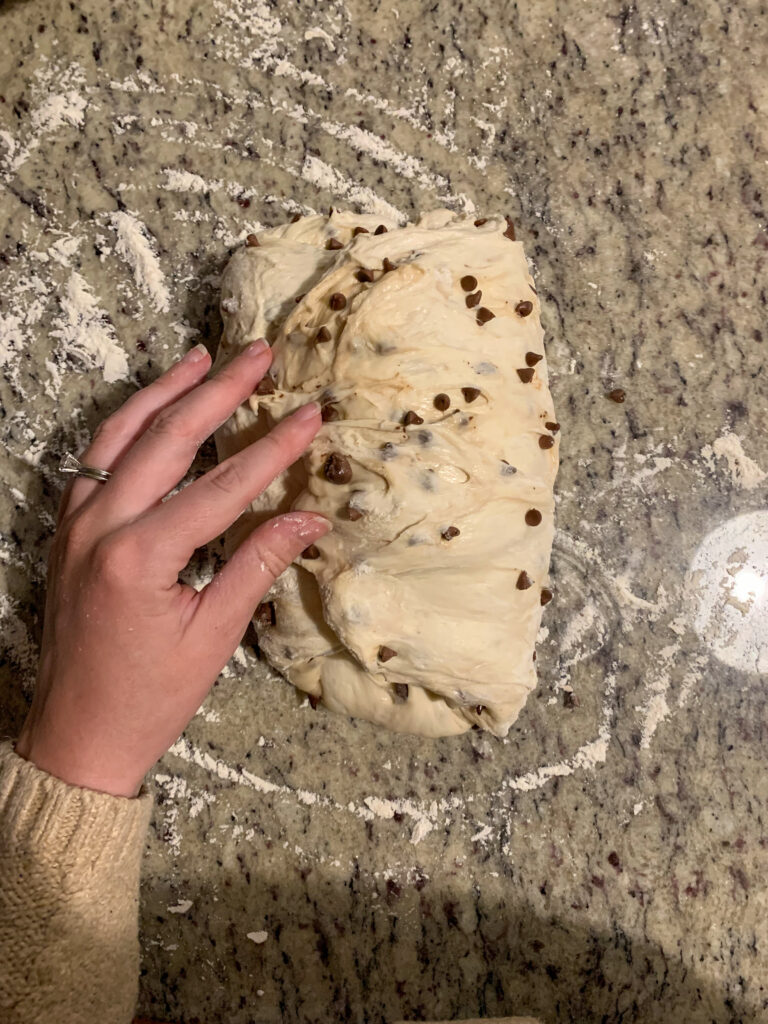
You will repeat this step four times, every 15 minutes or so. On the second stretch and fold add in the chocolate chips.
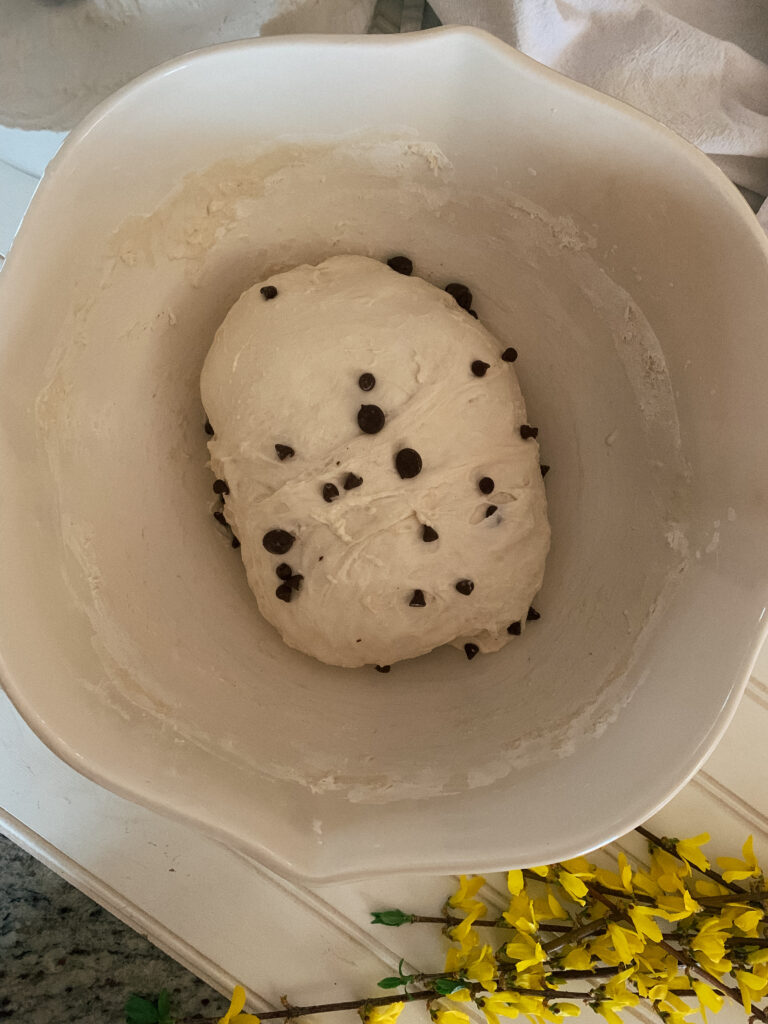
At the end of the four sets of stretch and folds, your chocolate chip sourdough should look similar to the image above. The dough should be stretchy, smooth, and the chocolate chips should be nicely incorporated.
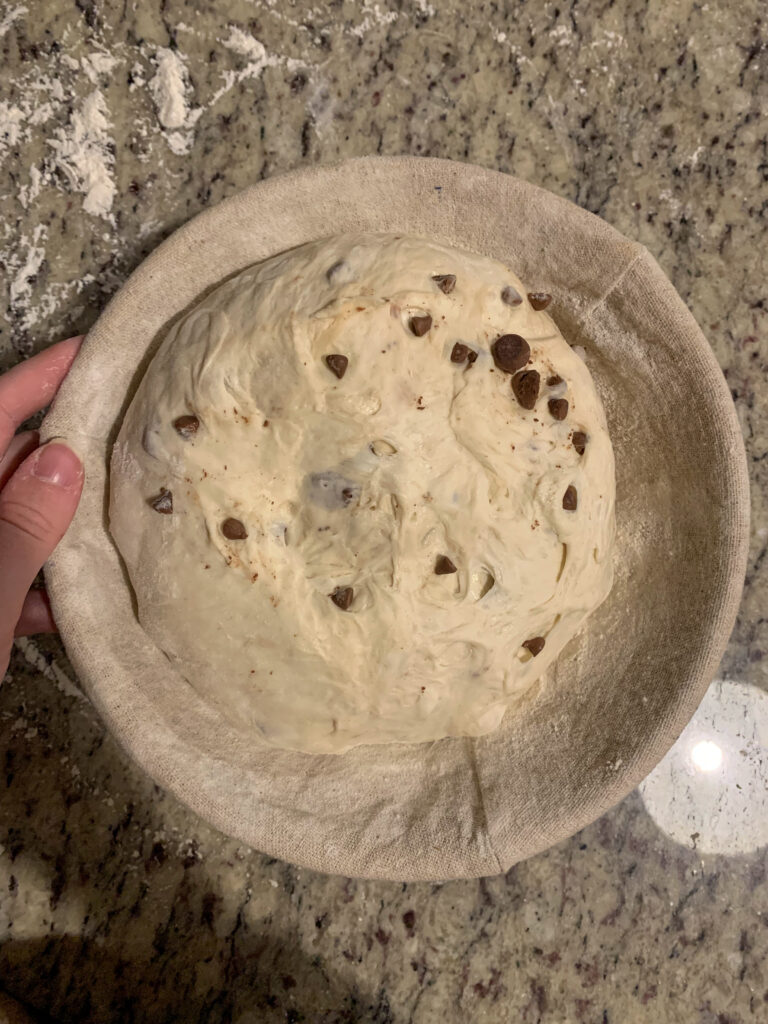
Now that the dough has been worked, leave the bowl on your counter in a warm space with a damp cloth covering it to bulk ferment for 6-8 hours.
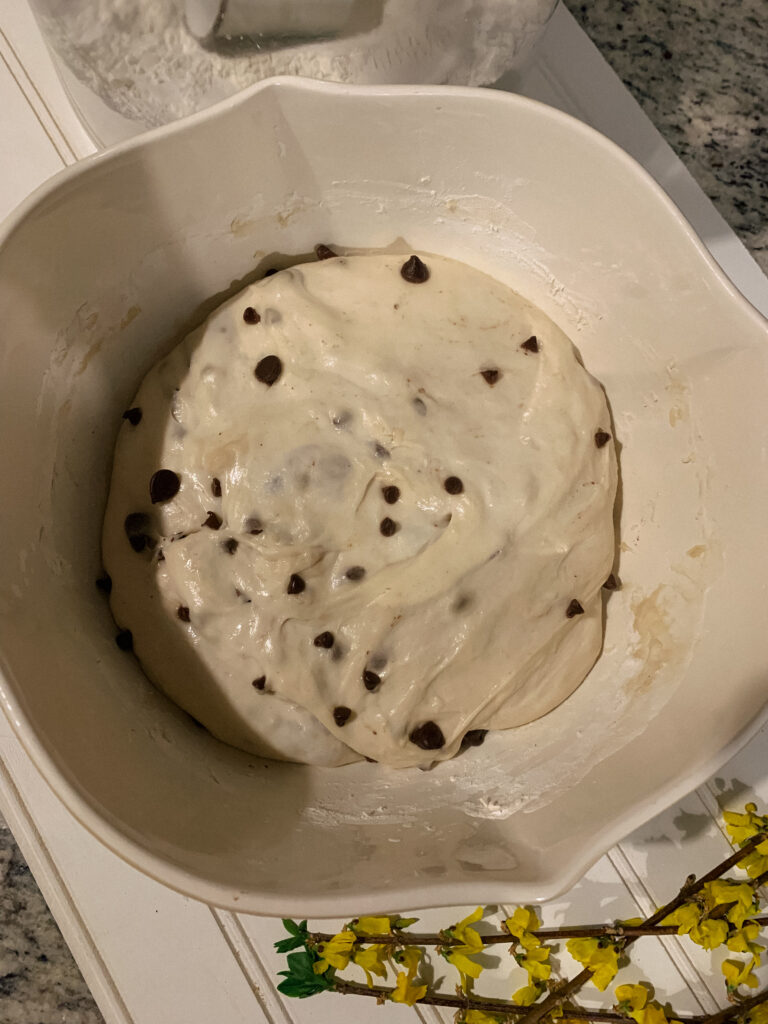
Once your dough is at the end of its bulk ferment it should be double in size and bubbly.
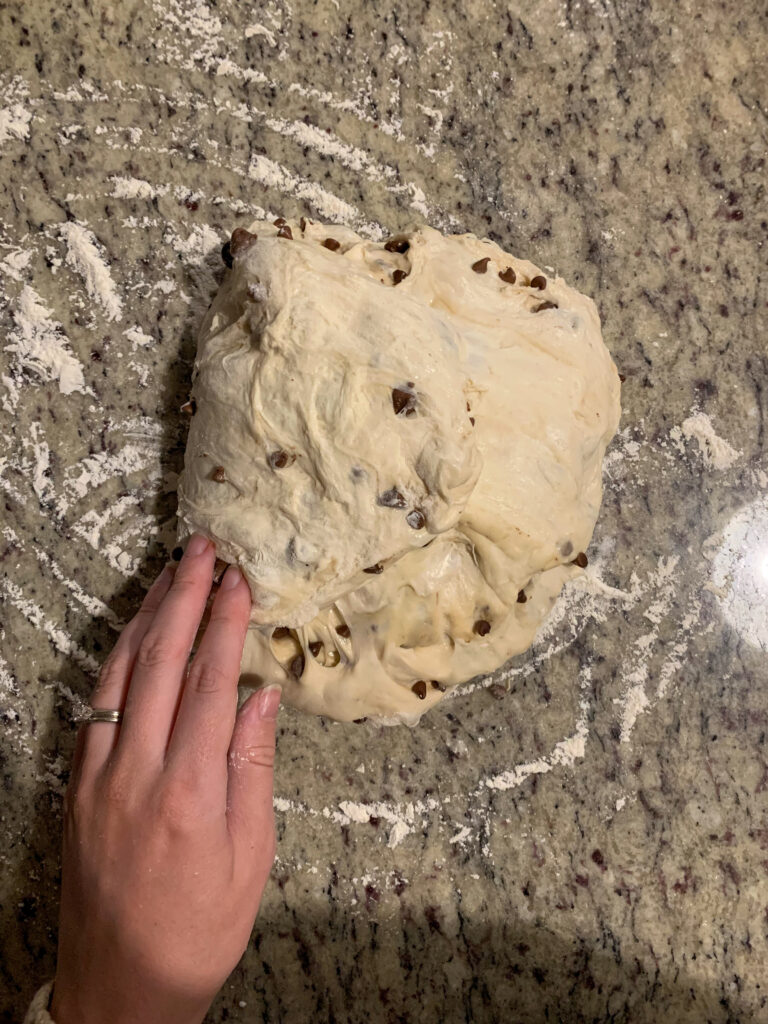
Dump the dough out on a very lightly floured surface and shape your dough by folding the bottom half onto itself and then folding the remaining top half onto itself. Then turn the dough 90 degrees and roll it until you have a cohesive oblong shape.
Finally, you are going to want to add some tension to the top of your dough by sliding the dough across the counter with the palm of your hand.
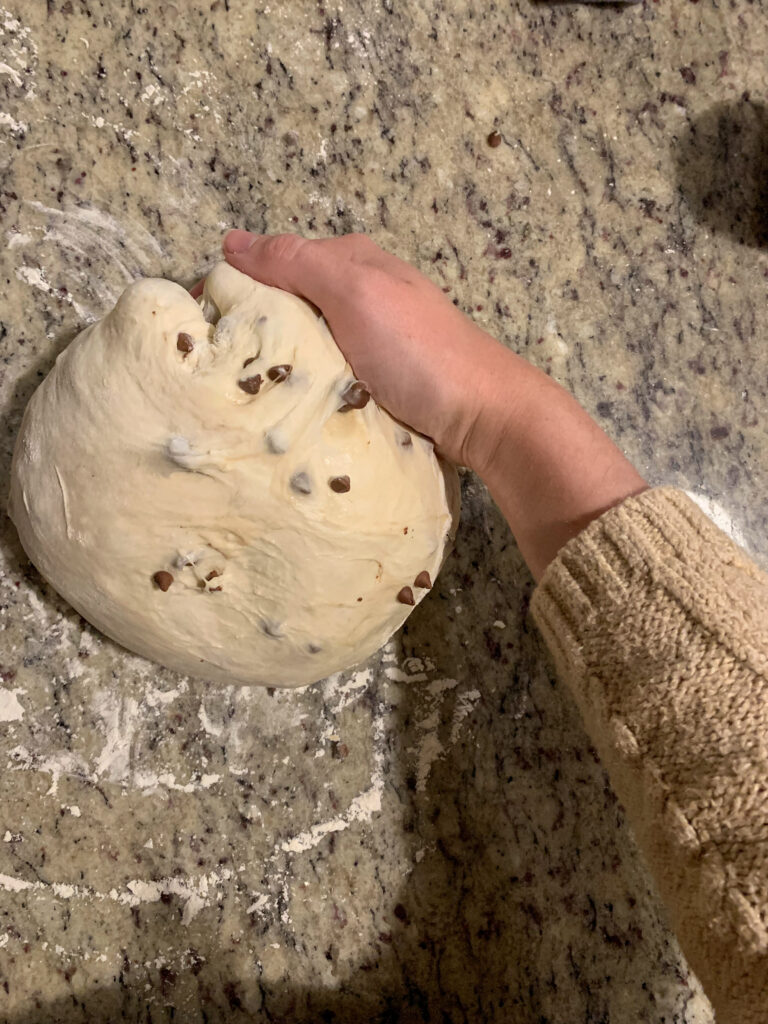
When you have a nice round dough shape. Transfer to a banneton basket or towel lined bowl for the final cold ferment. Cover with damp tea towel and place in the refrigerator for 8-12 hours.
How to Bake Chocolate Chip Sourdough Bread
When the cold ferment is complete and you are ready to bake, preheat your oven to 450 degrees Fahrenheit. Allow to pre-heat for 20-30 minutes with your Dutch oven inside.
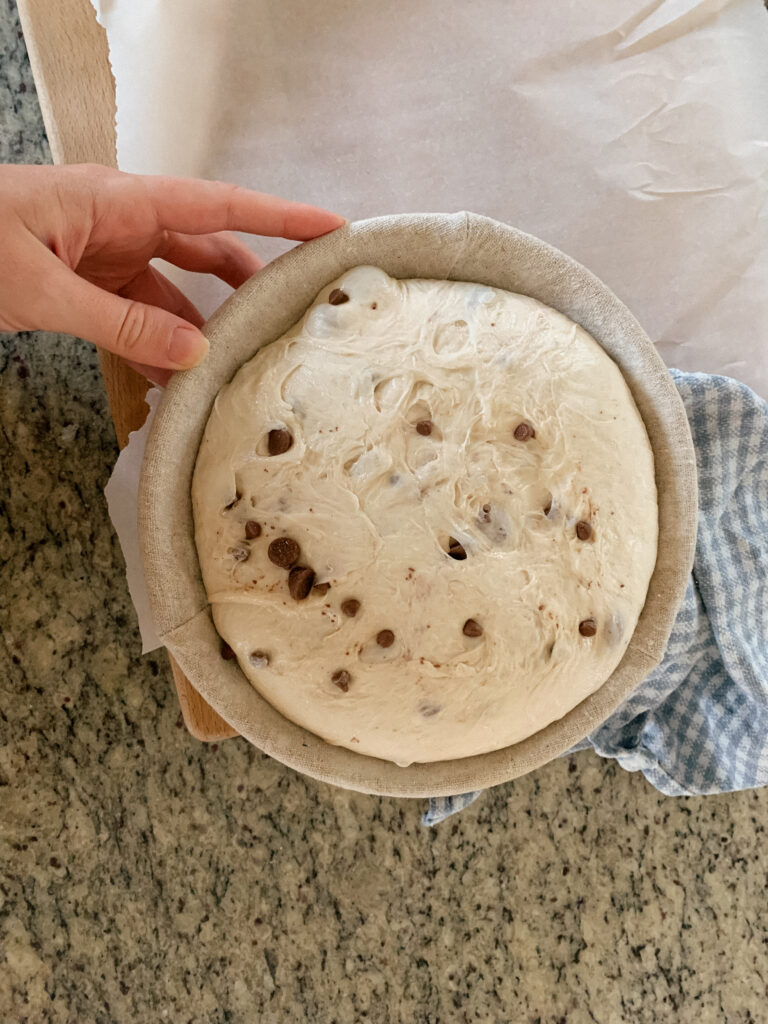
Remove your dough from the fridge, it should be about double the size and bubbly again.
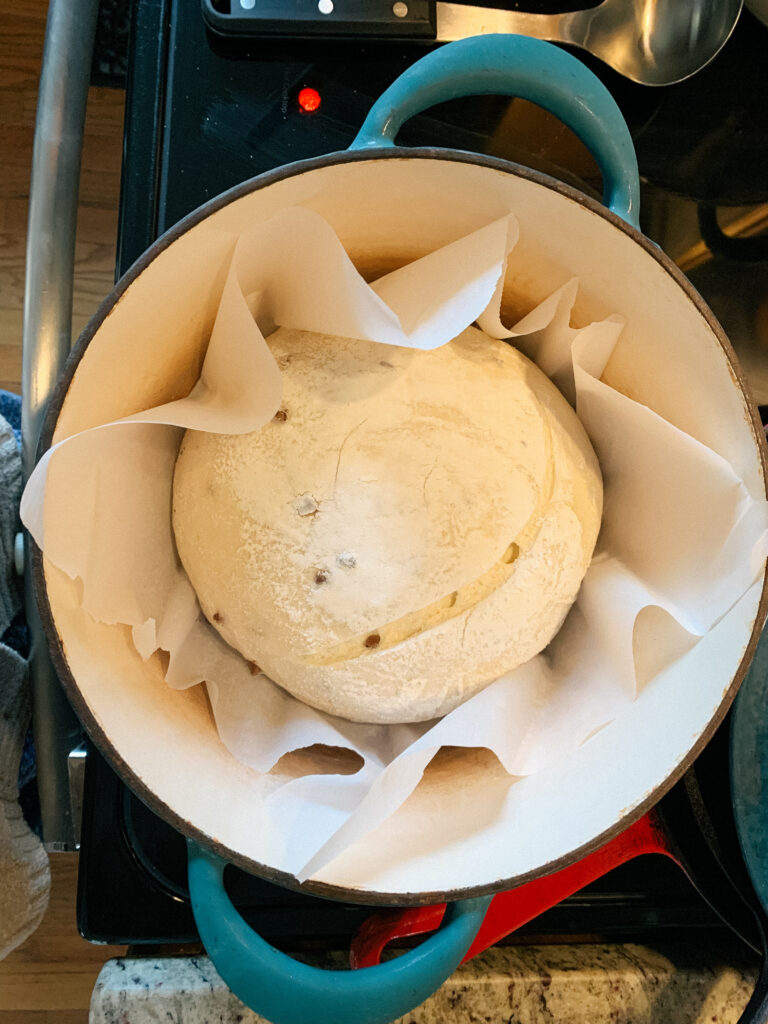
Transfer dough to a sheet of parchment paper and score the dough with a lame or really sharp knife.
Transfer dough using the parchment paper into a hot Dutch oven being careful not to burn yourself! The Dutch oven will be very hot.
Now, bake with the lid on for 25 minutes. Turn oven down to 400 degrees Fahrenheit. Remove lid and bake uncovered for an additional 15 minutes.
Once baked, allow to cool on a wire rack completely before slicing. This allows the chocolate chips to set!
Tips:
- If it’s cooler in your home, I recommend the using the counter above the dishwasher or in the oven with the light on for the bulk ferment.
- When making a loaf with any add-ins (chocolate chips, nuts, oats, cheese, etc.) you want to incorporate your add-ins on the second stretch and fold. This allows for the dough to rest and relax with your add-ins as well as thoroughly incorporate your add-ins.
- To ensure that your dough has been worked enough, you can test this by doing the “Window Pane” test. This is done by pulling a piece of dough up and stretching with both hands. If you can see through it, you are good to go.
- You can add in mini chocolate chips, chopped chocolate, or dark chocolate. Get creative, it will all taste great!
- The times given in the timeline below and in the instructions are just suggestions. If you are thirty minutes late on the bulk ferment, or if you need to leave the bread in the refrigerator for longer than 12 hours…the dough will be just fine!
Sourdough Timeline:
This particular timeline is what I use when I want fresh bread on Sunday for the beginning of the week. You can always change this to work with your individual schedule!
Friday Night
10 PM – Right before bed, I feed my sourdough starter
Saturday Morning
10AM – Begin making my dough
10:30 AM – Begin stretch and folds
11:15 AM – Finish stretch and folds, begin bulk ferment
Saturday Night
9:00 PM – Shape my bread and place in refrigerator
Sunday Morning
6:30 AM – Begin Preheating oven and Dutch oven
7:15 AM – Bake dough
8:00 AM – Done and ready for breakfast!
If you try this recipe please tag us on Instagram! @the_hollyhomestead
Simple & Easy Chocolate Chip Sourdough Bread
Ingredients
Equipment
Method
- Instructions: 1. Feed sourdough starter 8-12 hours before making dough. This is to ensure it is at it's peak active state.2. Combine water and starter in large mixing bowl.3. Add flour to water mixture.4. Cover with damp towel and allow to rest for 20-30 minutes.5. Add salt and work into dough with the first stretch and fold.Stretch and Folds1. Grab dough with wet hands and pull up, bouncing the dough, careful not to tear. Fold dough over itself. Turn bowl a quarter turn and repeat until all of the dough has been stretched and folded over itself. This is the first stretch and fold. 2. After 15 minutes, add chocolate chips to the dough. Repeat stretch and fold technique. 3. Repeat stretch and folds every 15 minutes, for two more rounds. (four total stretch and folds)4. Cover with a damp cloth and allow to rest in a warmer area of your kitchen for 8-12 hours. (Be careful to not over proof, you are looking for the dough to be doubled in size and bubbly)Shaping Dough1. Gently scrape dough out of bowl onto a clean worksurface that has been lightly dusted with flour. 2. Fold the bottom of the dough in towards center. Fold the remaining top half in on itself. Turn dough 90 degrees and roll up. Create tension by spinning the base of the dough across the surface with the palm of your hand. 3. Transfer ball of dough gently into a floured banneton or towel lined bowl. 4. Place in refrigerator for 8-12 hours, until ready to bake.Bake1. Preheat oven to 450℉2. Place Dutch oven inside and allow to preheat for 20-30 minutes.3. Once the oven and Dutch oven are heated properly, remove dough from refrigerator and transfer to a sheet of parchment paper. 4. Score the top of the dough. This can be as simple or as complex of a design as you'd like.5. Place parchment paper and dough directly into a hot Dutch oven, careful not to burn yourself. 6. Bake for 25 minutes with lid on. 7. After initial 25 minute bake, lower temp to 400℉ and bake an additional 15 minutes with the lid removed until golden brown.8. Allow to cool completely until chocolate chips have set.
Notes
- A sourdough starter at its bubbly peak or slightly after its peak will work the best for this recipe.
- A kitchen scale will result in the most accurate and consistence results.
- The time needed to bulk ferment will greatly be determined based on the temperature of your environment. Just keep an eye on this, as it could lead to an over proofed loaf.
- Dough that has been over proofed may not have the same rise, but it will still be delicious!
I have eaten this bread & it’s amazing!!